本页内容
使用 create-vite 构建 React 应用
React 是使用最广泛的 JavaScript 前端库。
在本教程中,我们将使用 Deno 构建一个简单的 React 应用。该应用将显示一个恐龙列表。当你点击其中一个时,它会带你到一个恐龙页面,显示更多详细信息。你可以在 GitHub 上查看完成的应用仓库

使用 Vite 和 Deno 创建一个 React 应用 Jump to heading
本教程将使用 create-vite 快速搭建一个 Deno 和 React 应用。Vite 是一个用于现代 Web 项目的构建工具和开发服务器。它与 React 和 Deno 配合良好,利用 ES 模块并允许你直接导入 React 组件。
在你的终端中运行以下命令,使用 TypeScript 模板创建一个新的 Vite React 应用
deno run -A npm:create-vite@latest --template react-ts
当提示时,给你的应用命名,然后 cd 进入新创建的项目目录。然后运行以下命令安装依赖
deno install
现在你可以通过运行以下命令来服务你的新 React 应用
deno task dev
这将启动 Vite 服务器,点击指向 localhost 的输出链接即可在浏览器中查看你的应用。如果你安装了 VSCode 的 Deno 扩展,你可能会注意到编辑器中会突出显示一些代码错误。这是因为 Vite 创建的应用是针对 Node 设计的,因此使用了一些 Deno 不支持的约定(例如“松散导入”——导入模块时不带文件扩展名)。禁用此项目的 Deno 扩展以避免这些错误,或者尝试 使用 deno.json 文件构建 React 应用的教程。
添加后端 Jump to heading
下一步是添加一个后端 API。我们将创建一个非常简单的 API,它返回有关恐龙的信息。
在你的新项目根目录中,创建一个 api 文件夹。在该文件夹中,创建一个 main.ts 文件,用于运行服务器,以及一个 data.json 文件,用于包含硬编码的恐龙数据。
将 此 JSON 文件 复制并粘贴到 api/data.json 文件中。
我们将构建一个简单的 API 服务器,其中包含返回恐龙信息的路由。我们将使用 oak 中间件框架 和 cors 中间件 来启用 CORS。
使用 deno add 命令将所需的依赖项添加到你的项目中
deno add jsr:@oak/oak jsr:@tajpouria/cors
接下来,更新 api/main.ts 以导入所需的模块并创建一个新的 Router 实例来定义一些路由
import { Application, Router } from "@oak/oak";
import { oakCors } from "@tajpouria/cors";
import data from "./data.json" with { type: "json" };

const router = new Router();
在此之后,在同一文件中,我们将定义两个路由。一个在 /api/dinosaurs 返回所有恐龙,另一个在 /api/dinosaurs/:dinosaur 根据 URL 中的名称返回特定的恐龙
router.get("/api/dinosaurs", (context) => {
  context.response.body = data;
});

router.get("/api/dinosaurs/:dinosaur", (context) => {
  if (!context?.params?.dinosaur) {
    context.response.body = "No dinosaur name provided.";
  }

  const dinosaur = data.find((item) =>
    item.name.toLowerCase() === context.params.dinosaur.toLowerCase()
  );

  context.response.body = dinosaur ?? "No dinosaur found.";
});
最后,在同一文件的底部,创建一个新的 Application 实例,并使用 app.use(router.routes()) 将我们刚刚定义的路由附加到应用程序,然后启动服务器监听端口 8000
const app = new Application();
app.use(oakCors());
app.use(router.routes());
app.use(router.allowedMethods());

await app.listen({ port: 8000 });
你可以使用 deno run --allow-env --allow-net api/main.ts 运行 API 服务器。我们将创建一个任务在后台运行此命令,并更新开发任务以同时运行 React 应用和 API 服务器。
在你的 package.json 文件中,更新 scripts 字段以包含以下内容
{
  "scripts": {
    "dev": "deno task dev:api & deno task dev:vite",
    "dev:api": "deno run --allow-env --allow-net api/main.ts",
    "dev:vite": "deno run -A npm:vite",
    // ...
}
如果你现在运行 deno task dev 并访问浏览器中的 localhost:8000/api/dinosaurs,你应该会看到所有恐龙的 JSON 响应。
Deno 中的 React 支持 Jump to heading
此时,你的 IDE 或编辑器可能会显示有关项目中缺少类型的警告。Deno 对 React 应用程序具有内置的 TypeScript 支持。要启用此功能,你需要使用适当的类型定义和 DOM 库来配置你的项目。创建或更新你的 deno.json 文件,其中包含以下 TypeScript 编译器选项
"compilerOptions": {
  "types": [
    "react",
    "react-dom",
    "@types/react"
  ],
  "lib": [
    "dom",
    "dom.iterable",
    "deno.ns"
  ],
  "jsx": "react-jsx",
  "jsxImportSource": "react"
}
更新入口文件 Jump to heading
React 应用的入口点位于 src/main.tsx 文件中。我们的将非常基础
import { StrictMode } from "react";
import { createRoot } from "react-dom/client";
import "./index.css";
import App from "./App.tsx";

createRoot(document.getElementById("root")!).render(
  <StrictMode>
    <App />
  </StrictMode>,
);
添加路由 Jump to heading
该应用将有两个路由:/ 和 /:dinosaur。
我们将使用 react-router-dom 来构建一些路由逻辑,因此我们需要将 react-router-dom 依赖添加到你的项目中。在项目根目录运行
deno add npm:react-router-dom
更新 /src/App.tsx 文件以导入并使用来自 react-router-dom 的 BrowserRouter 组件并定义这两个路由
import { BrowserRouter, Route, Routes } from "react-router-dom";
import Index from "./pages/index.tsx";
import Dinosaur from "./pages/Dinosaur.tsx";
import "./App.css";

function App() {
  return (
    <BrowserRouter>
      <Routes>
        <Route path="/" element={<Index />} />
        <Route path="/:selectedDinosaur" element={<Dinosaur />} />
      </Routes>
    </BrowserRouter>
  );
}

export default App;
代理转发 API 请求 Jump to heading
Vite 将在端口 5173 提供应用程序,而我们的 API 在端口 8000 运行。因此,我们需要设置一个代理,允许路由器访问 api/ 路径。用以下内容覆盖 vite.config.ts 以配置代理
import { defineConfig } from "vite";
import react from "@vitejs/plugin-react";

export default defineConfig({
  plugins: [react()],
  server: {
    proxy: {
      "/api": {
        target: "https://:8000",
        changeOrigin: true,
      },
    },
  },
});
创建页面 Jump to heading
我们将创建两个页面:Index 和 Dinosaur。Index 页面将列出所有恐龙,而 Dinosaur 页面将显示特定恐龙的详细信息。
在 src 目录下创建一个 pages 文件夹,并在其中创建两个文件:index.tsx 和 Dinosaur.tsx。
类型 Jump to heading
这两个页面都将使用 Dino 类型来描述它们期望从 API 获取的数据的形状,所以我们将在 src 目录中创建一个 types.ts 文件
export type Dino = { name: string; description: string };
index.tsx Jump to heading
此页面将从 API 获取恐龙列表并将其渲染为链接
import { useEffect, useState } from "react";
import { Link } from "react-router-dom";
import { Dino } from "../types.ts";

export default function Index() {
  const [dinosaurs, setDinosaurs] = useState<Dino[]>([]);

  useEffect(() => {
    (async () => {
      const response = await fetch(`/api/dinosaurs/`);
      const allDinosaurs = await response.json() as Dino[];
      setDinosaurs(allDinosaurs);
    })();
  }, []);

  return (
    <main>
      <h1>Welcome to the Dinosaur app</h1>
      <p>Click on a dinosaur below to learn more.</p>
      {dinosaurs.map((dinosaur: Dino) => {
        return (
          <Link
            to={`/${dinosaur.name.toLowerCase()}`}
            key={dinosaur.name}
            className="dinosaur"
          >
            {dinosaur.name}
          </Link>
        );
      })}
    </main>
  );
}
Dinosaur.tsx Jump to heading
此页面将从 API 获取特定恐龙的详细信息并将其渲染在一个段落中
import { useEffect, useState } from "react";
import { Link, useParams } from "react-router-dom";
import { Dino } from "../types.ts";

export default function Dinosaur() {
  const { selectedDinosaur } = useParams();
  const [dinosaur, setDino] = useState<Dino>({ name: "", description: "" });

  useEffect(() => {
    (async () => {
      const resp = await fetch(`/api/dinosaurs/${selectedDinosaur}`);
      const dino = await resp.json() as Dino;
      setDino(dino);
    })();
  }, [selectedDinosaur]);

  return (
    <div>
      <h1>{dinosaur.name}</h1>
      <p>{dinosaur.description}</p>
      <Link to="/">🠠 Back to all dinosaurs</Link>
    </div>
  );
}
恐龙列表的样式设计 Jump to heading
由于我们正在主页上显示恐龙列表,让我们做一些基本格式化。将以下内容添加到 src/App.css 底部,以有序的方式显示我们的恐龙列表
.dinosaur {
  display: block;
}
运行应用 Jump to heading
要运行该应用,请使用你之前设置的任务
deno task dev
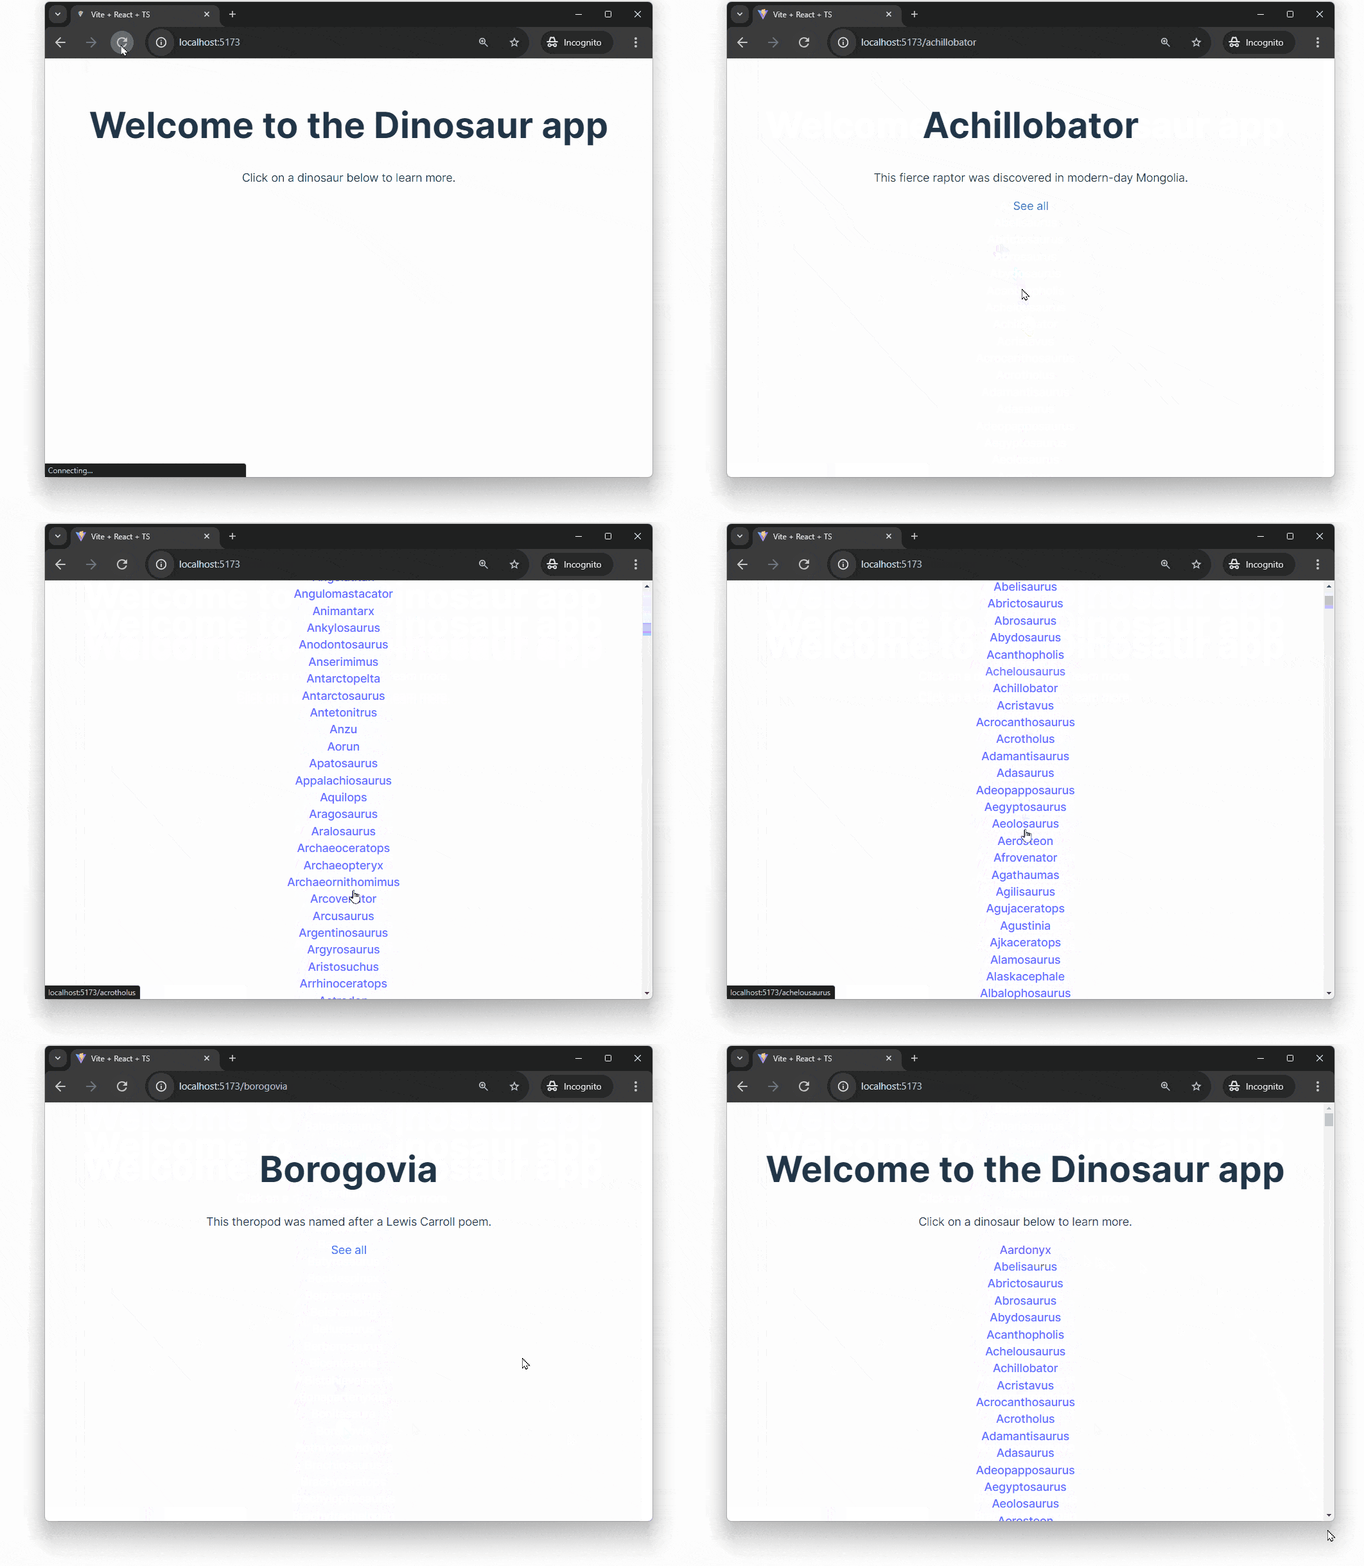
在浏览器中导航到本地 Vite 服务器(localhost:5173),你应该会看到显示的恐龙列表,你可以点击查看每个恐龙的详细信息。

构建和部署 Jump to heading
此时,应用由 Vite 开发服务器提供服务。要在生产环境中提供应用,你可以使用 Vite 构建应用,然后使用 Deno 提供构建好的文件。为此,我们需要更新 API 服务器以提供构建好的文件。我们将编写一些中间件来完成此操作。在你的 api 目录中,创建一个新文件夹 util 和一个新文件 routeStaticFilesFrom.ts,并添加以下代码
import { Next } from "jsr:@oak/oak/middleware";
import { Context } from "jsr:@oak/oak/context";

// Configure static site routes so that we can serve
// the Vite build output and the public folder
export default function routeStaticFilesFrom(staticPaths: string[]) {
  return async (context: Context<Record<string, object>>, next: Next) => {
    for (const path of staticPaths) {
      try {
        await context.send({ root: path, index: "index.html" });
        return;
      } catch {
        continue;
      }
    }

    await next();
  };
}
此中间件将尝试从 staticPaths 数组中提供的路径提供静态文件。如果文件未找到,它将调用链中的下一个中间件。我们现在可以更新 api/main.ts 文件以使用此中间件
import { Application, Router } from "@oak/oak";
import { oakCors } from "@tajpouria/cors";
import data from "./data.json" with { type: "json" };
import routeStaticFilesFrom from "./util/routeStaticFilesFrom.ts";

const router = new Router();

router.get("/api/dinosaurs", (context) => {
  context.response.body = data;
});

router.get("/api/dinosaurs/:dinosaur", (context) => {
  if (!context?.params?.dinosaur) {
    context.response.body = "No dinosaur name provided.";
  }

  const dinosaur = data.find((item) =>
    item.name.toLowerCase() === context.params.dinosaur.toLowerCase()
  );

  context.response.body = dinosaur ? dinosaur : "No dinosaur found.";
});

const app = new Application();
app.use(oakCors());
app.use(router.routes());
app.use(router.allowedMethods());
app.use(routeStaticFilesFrom([
  `${Deno.cwd()}/dist`,
  `${Deno.cwd()}/public`,
]));

await app.listen({ port: 8000 });
在你的 package.json 文件中添加一个 serve 脚本,以便用 Vite 构建应用,然后运行 API 服务器
{
  "scripts": {
    // ...
    "serve": "deno task build && deno task dev:api",
}
现在你可以通过运行以下命令,使用 Deno 提供构建好的应用
deno task serve
如果你在浏览器中访问 localhost:8000,你应该会看到应用程序正在运行!
🦕 现在你可以使用 Vite 和 Deno 搭建和开发 React 应用了!你已经准备好构建极速的 Web 应用程序。我们希望你喜欢探索这些尖端工具,我们迫不及待地想看到你创造出什么!